How to Make Your Pencil Drawings Look 3D: The Complete Beginner’s Guide
There is a moment every artist remembers: staring at a flat, lifeless sketch and wondering why it refuses to jump off the page. The secret isn’t talent, and it certainly isn’t expensive supplies. It’s understanding how light behaves in the real world and translating that behaviour onto paper. Three-dimensionality isn’t drawn — it’s *illuminated*. Once you grasp that, every line you make will start carrying weight, form, and presence.
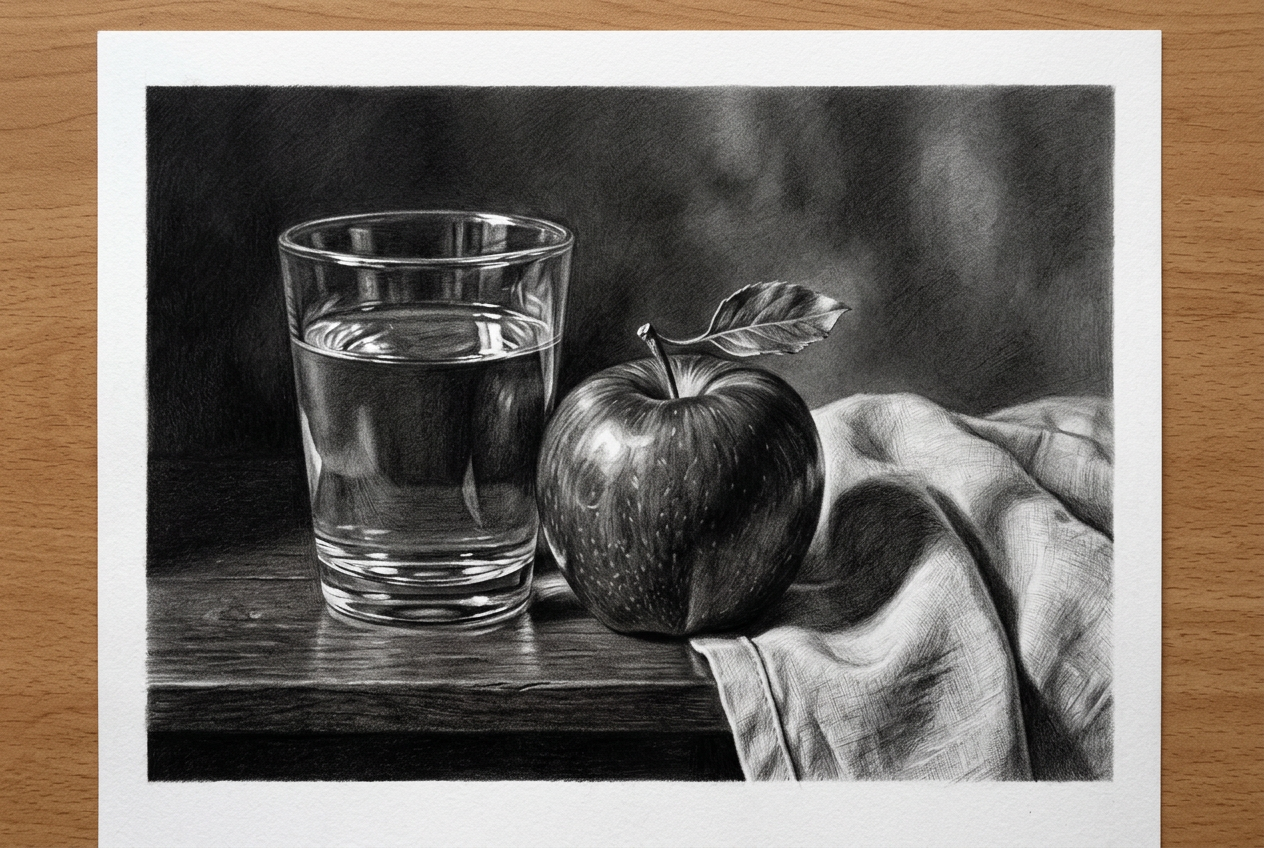
In this guide, you’ll learn the fundamental techniques professional artists use to create drawings so convincing you could swear you’re looking through a window instead of at paper. We’ll move step by step: from understanding light, to choosing tools, to practising the five core shading drills. Every example is paired with an illustration, so you can match the theory to the marks you see.
A field-tested walkthrough of light, shadow, and value—the three ingredients that turn flat sketches into drawings you can almost touch.
Train Your Eye Before You Train Your Hand
Before any pencil touches paper, spend five minutes simply looking at an object on your desk. Notice where the light lands brightest. Notice how the surface darkens as it curves away. Notice the thin sliver of light bouncing back at the bottom edge, and the soft shadow stretching across the table. Most beginners skip this step and dive straight into drawing—which is why their drawings feel flat. The eye is the real instrument. The pencil only records what it sees.
Why Your Drawings Look Flat
Before fixing the problem, let’s understand it. Flat drawings happen when artists treat every part of a subject with equal value—light pencil pressure everywhere, no real darks, no real lights. The brain reads a uniform surface as a flat one.
Real objects aren’t flat. They have surfaces that turn away from light, surfaces that catch it, and surfaces that bounce ambient light back. Your job is to recreate those value relationships. Master value, and form follows.
The Five Elements of Form
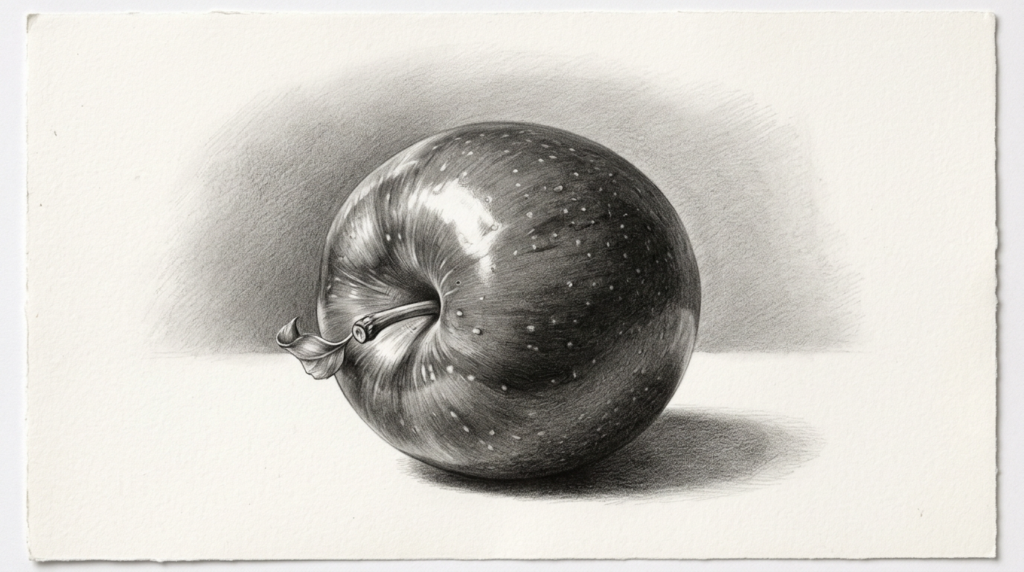
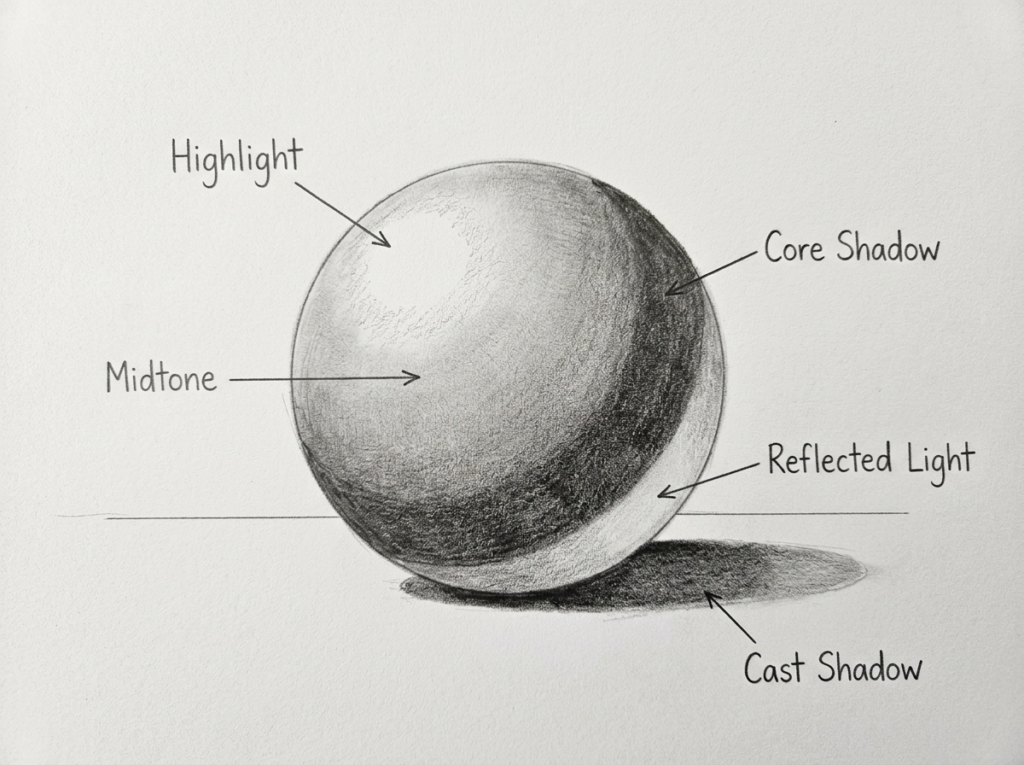
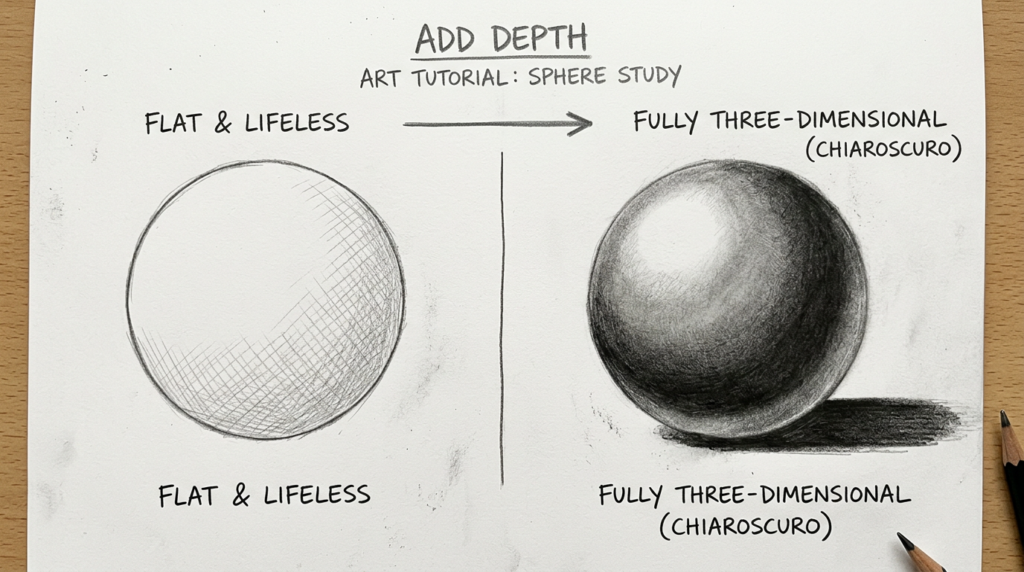
Every 3D drawing is built from five core shading zones. Study these on any sphere—a ball, an egg, an orange—and they’ll apply to everything else:
Highlight—the brightest spot where light hits directly. Often left as pure white paper.
Light side (midtone)—the area receiving direct light but angled slightly away.
Core shadow—the darkest part of the object’s form, where the surface turns completely away from light.
Reflected light—a subtle bounce of light from surrounding surfaces, sitting just below the core shadow.
Cast shadow—the shadow the object throws onto the surface below.
Your Toolkit: Less Is More
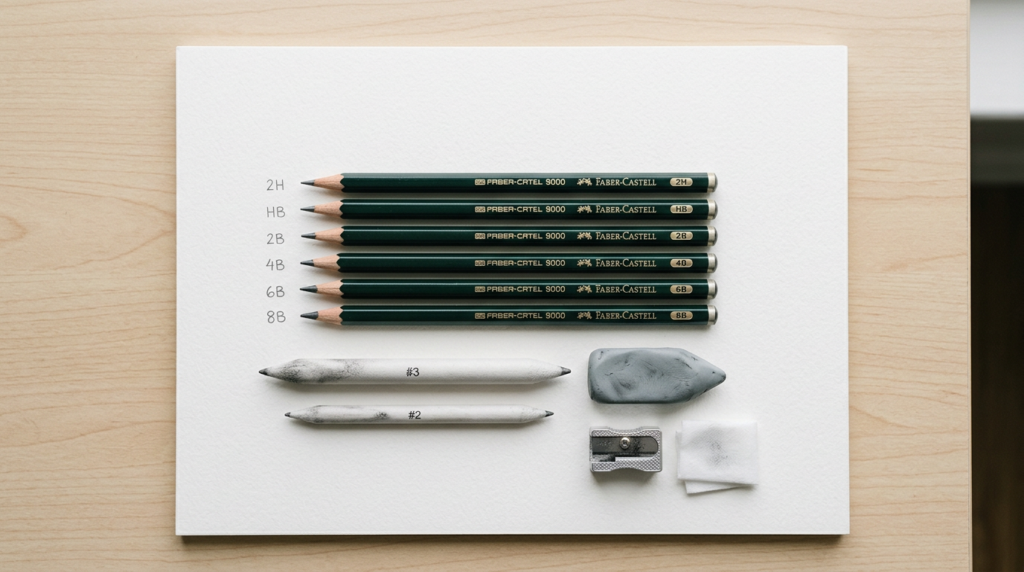
The biggest beginner trap is buying gear before building skill. You don’t need fifty pencils. A small, well-chosen kit will carry you through any beginner project, and you can expand later as your eye develops:
A 2B pencil—your workhorse for general shading and midtones.
A 6B or 8B pencil—for rich, deep darks that give a drawing weight.
An HB or 2H pencil—for light sketching and initial outlines.
A kneaded eraser—mold it into a point to lift highlights or sharpen edges.
A blending stump—tortillons or paper stumps smooth graphite into seamless gradients.
Smooth drawing paper—90–100 lb bristol or drawing paper holds graphite beautifully.
Choosing paper: smoother papers (like hot-press bristol) are forgiving and ideal for photorealistic blending. Slightly textured papers (like medium vellum) grip the graphite and reward cross-hatching. Avoid cheap, slick copy paper—it pills under repeated layering and dulls your pencils within minutes.
Technique 1: Building a Value Scale
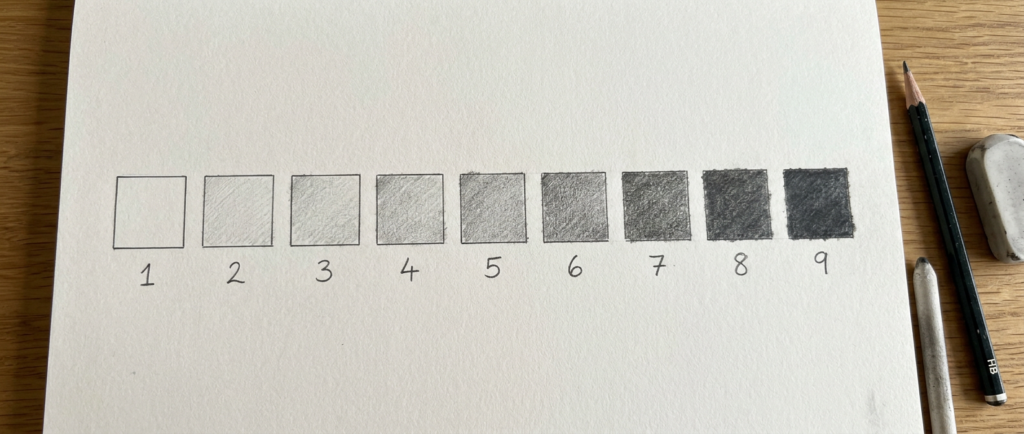
Before drawing anything, draw a value scale. Make nine small squares and shade each progressively darker — from a whisper of graphite to the deepest black your pencil can produce. This is your tonal map, your reference for how light or dark something should be.
Practise moving your hand in tiny circles while gradually increasing pressure. The variation in pressure is what creates depth, and the value scale trains your eye to recognise it.
Technique 2: Shading a Sphere—The King of Drills
Before drawing anything, draw a value scale. Make nine small squares and shade each progressively darker — from a whisper of graphite to the deepest black your pencil can produce. This is your tonal map, your reference for how light or dark something should be.
Practise moving your hand in tiny circles while gradually increasing pressure. The variation in pressure is what creates depth, and the value scale trains your eye to recognise it.

*A nine-step value scale is the cheapest, fastest drawing exercise with the highest return.*
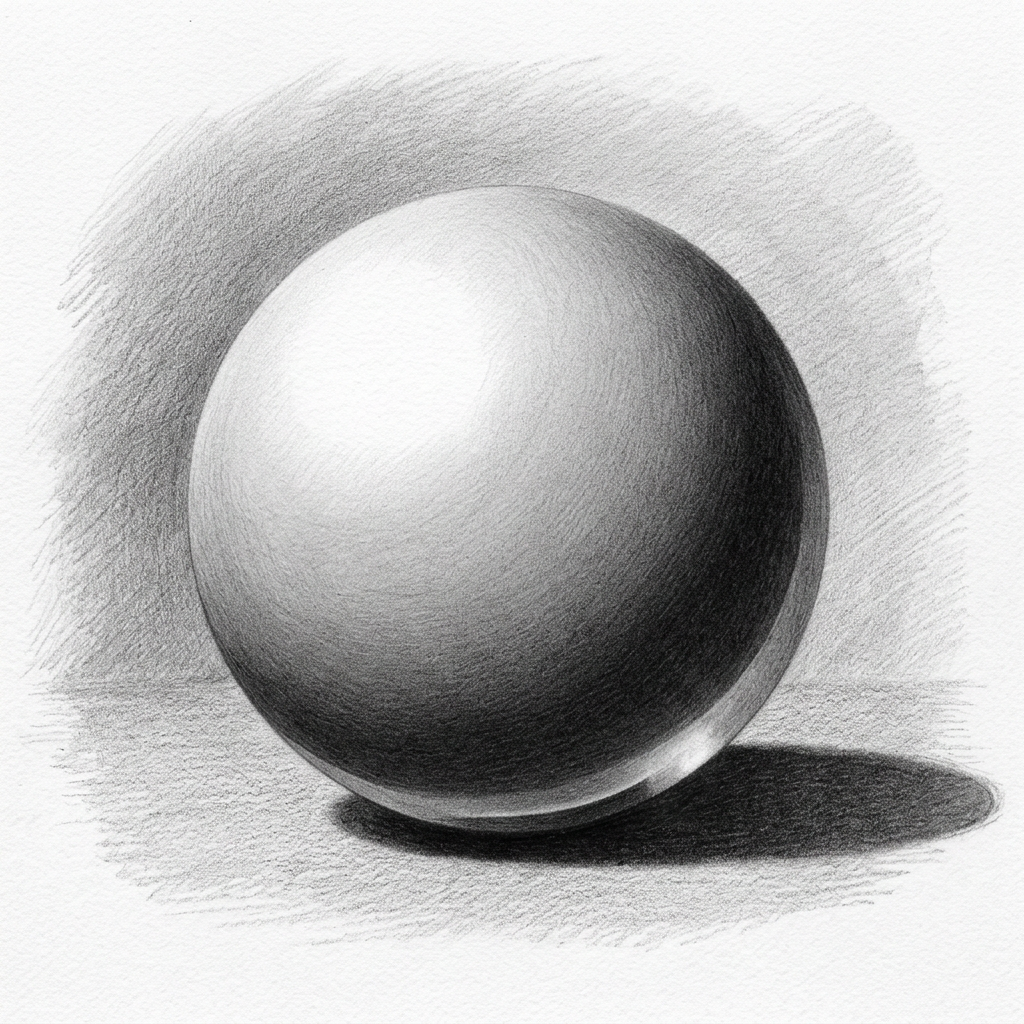
The sphere is the foundation of all form. Master it, and you can shade anything.
**Step 1.** Lightly sketch a circle. Don’t press hard — you’ll erase this later.
**Step 2.** Decide where your light is coming from. Mark the highlight (leave it white), the core shadow (on the side opposite the light), and the cast shadow on the ground.
**Step 3.** Begin shading the midtones with light, even pressure using a 2B. Use small circular strokes — they hide pencil lines better than straight hatching.
**Step 4.** Deepen the core shadow with your 6B. Make it darkest at the edge of the form where it meets the background.
**Step 5.** Add reflected light — barely lighter than the core shadow — along the bottom edge.
**Step 6.** Use a blending stump to soften transitions, especially between midtone and core shadow.
**Step 7.** Place a sharp, dark cast shadow on the ground. The edge closest to the object is darkest; it softens as it stretches away.
**Step 8.** Use a kneaded eraser to lift a crisp highlight if needed.
Technique 3: The Cube—Sharpening Your Edges
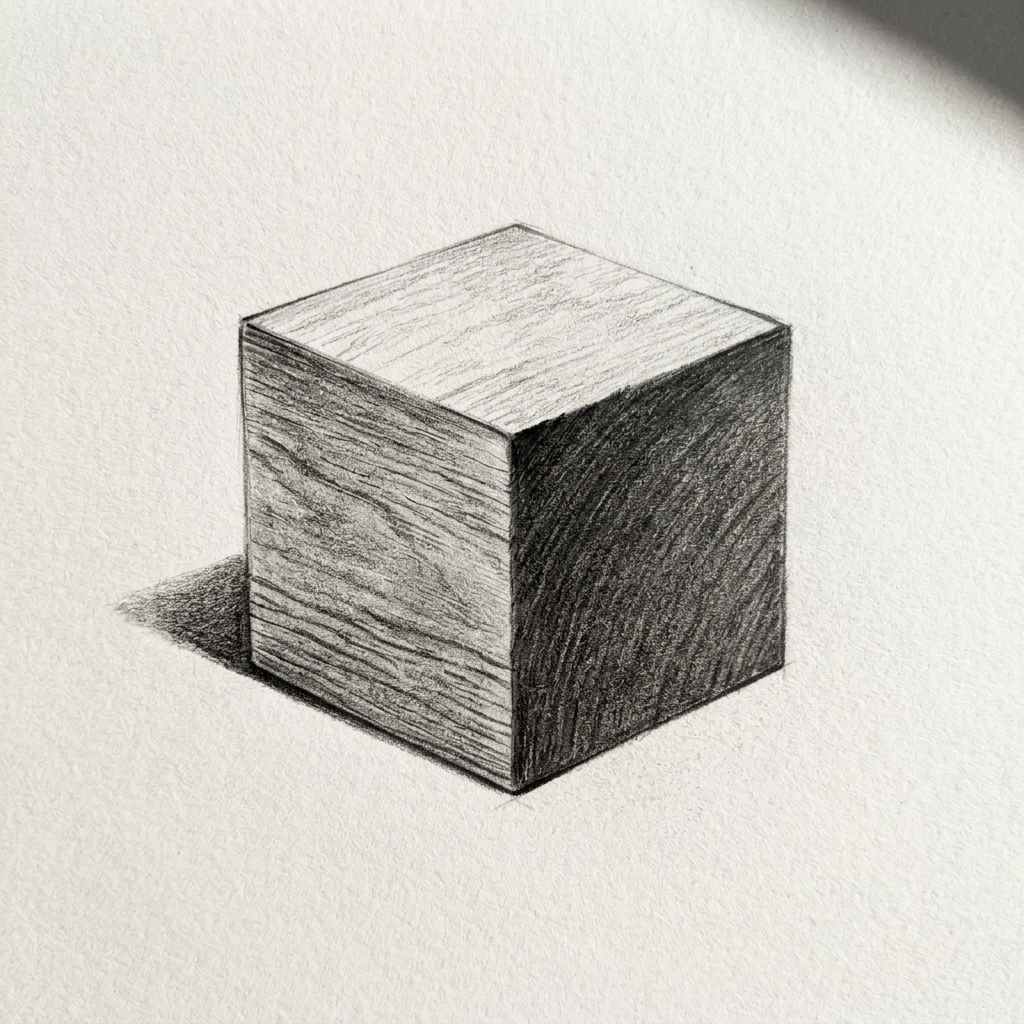
Spheres teach softness; cubes teach precision. Draw a cube and you’ll learn how three different planes can each receive different amounts of light.
The top plane (facing the light) is the lightest.
The front plane (facing the viewer) is the midtone.
The side plane (turned away) is the darkest.
This simple rule—called light logic—is the single biggest leap you can make toward 3D drawing. Once you see it, you can’t unsee it. Light logic: top brightest, front midtone, side darkest. Every flat plane obeys this.
Technique 4: Cross-Hatching for Texture and Depth
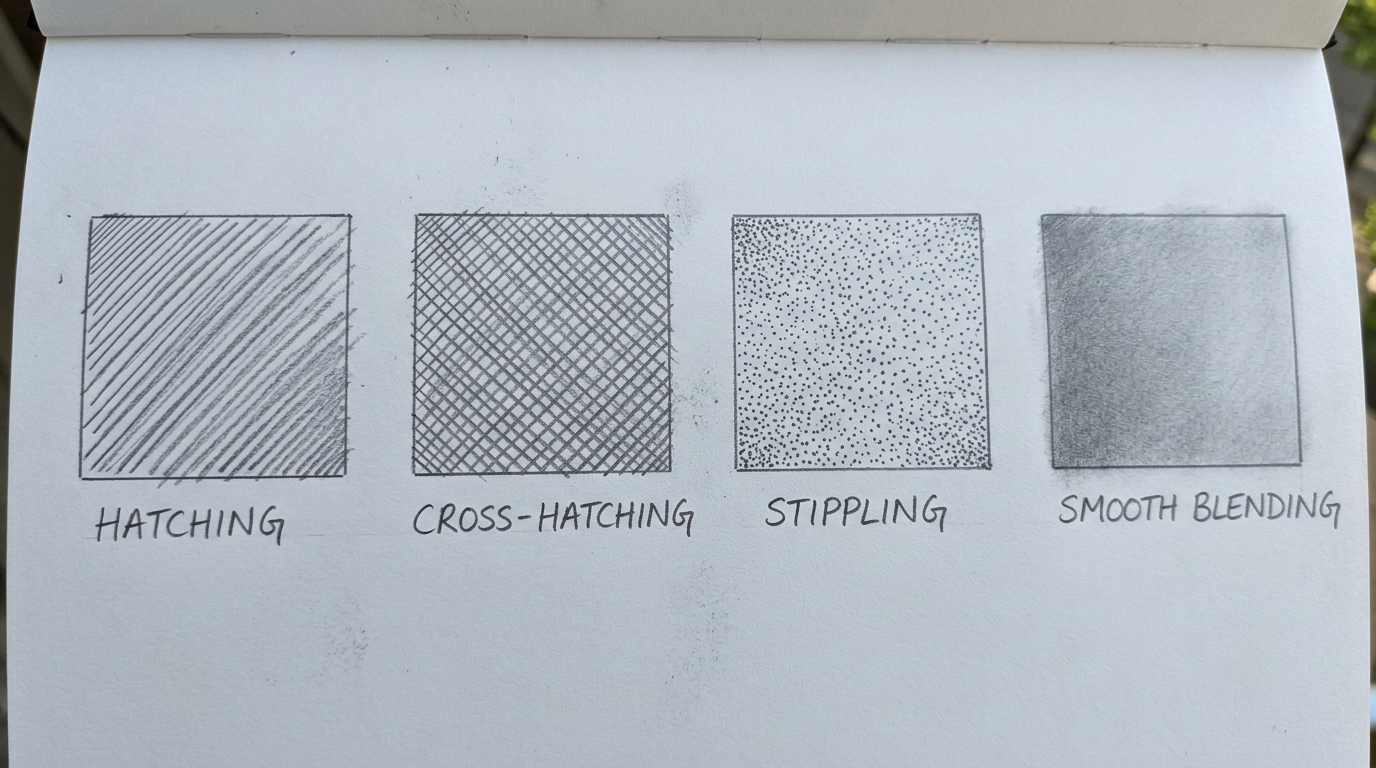
Cross-hatching is layering sets of parallel lines in different directions. First layer: horizontal strokes. Second layer: vertical strokes crossing over them. Third layer: diagonal. Each layer darkens the value without adding visible smudging, which is why illustrators have used it for centuries.
This technique is perfect for hair, fabric, wood, and metal—any surface where you want to retain a sense of texture while building form. The key is consistent spacing: as a surface curves away, the lines should become denser and slightly curved to follow the form. As a surface flattens, the spacing relaxes.
Keep your pencil sharp and your strokes confident. Hesitant strokes look scratchy; decisive strokes look deliberate.
If your hatching looks “stripey,” you’re probably pressing harder at the start of each stroke than at the end. Try pivoting from the wrist and letting the pencil tip lead with even pressure across the full length of each line.
Technique 5: The Lost-and-Found Edge
A lost edge is where one form softly blends into another, or into the background. A found edge is a sharp, defined boundary.
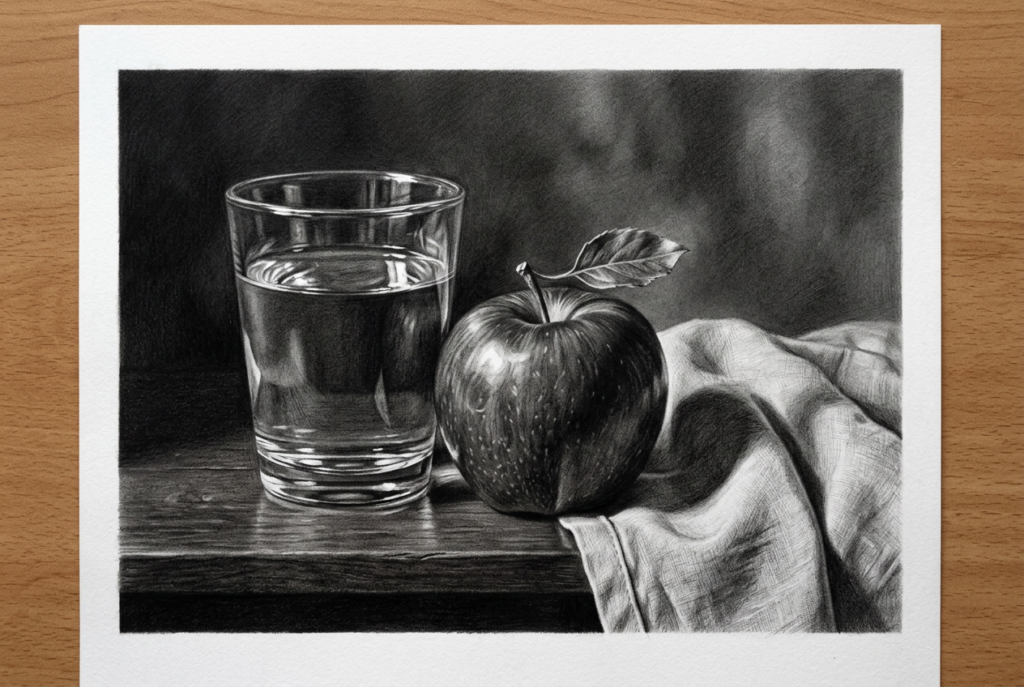
Great drawings balance both. Hard edges on focal areas pull the eye in; soft edges let other areas recede. Use it on portraits especially—sharpen the cheekbone, soften the jawline where it meets the neck. Use it on still life—let the back edge of a vase dissolve into the background while the front edge stays crisp. Edges are how you direct attention, and the difference between a competent drawing and a magnetic one usually lives in the edges.
Common Mistakes Beginners Make
Pressing too hard from the start. You can’t erase deep graphite. Build up in layers.
Skipping the cast shadow. Without it, your subject floats in space.
Outlining everything. Real forms don’t have outlines; they have value changes. Soften edges where planes turn.
Ignoring the background. A midtone background makes a light subject pop; a dark background makes it recede.
Rushing. Slow observation is the secret of every master.
A 7-Day Practice Plan
Day 1: Draw a value scale ten times.
Day 2: Shade one sphere from life (an apple works beautifully).
Day 3: Shade another sphere from imagination, using memory.
Day 4: Draw a cube, then a cylinder, then a cone. Combine them into a still life.
Day 5: Practise cross-hatching on a textured surface (a basket, a piece of fabric).
Day 6: Draw a portrait focusing on light logic—separate the lit side from the shadow side first.
Day 7: Combine everything into a single finished drawing.
Final Thought
Three-dimensional drawing isn’t a gift. It’s a skill—and like every skill, it rewards repetition over inspiration. Every professional artist once produced flat, lifeless sketches. The difference between them and a beginner isn’t talent; it’s the patience to study light, layer values, and revise.
Pick up your pencil. Light your subject from one direction. Start observing. The page will do the rest. And the day your drawing looks back at you with real weight and depth—the day someone asks, “Is that a photograph?“—you’ll know the lessons have landed.
Keep drawing. Keep observing. The pencil is patient.